Not only UI prototypes can be built with Protopie Connect, but also physical interactions! In this sample we will interface with an Arduino Microcontroller featuring a rotary encoder to control a digital interface.
Upload tracks from Hapticlabs Studio
Start of by importing the uart.hptl file from the Github Repository via File -> Export/Import and upload the Project to the Satellite (Satellite -> Upload Project to Satellite)
Alternatively you can also design the tracks from scratch and giving them unique names to call from Protopie. Learn more about uploading your project to the satellite.

Close the serial communication
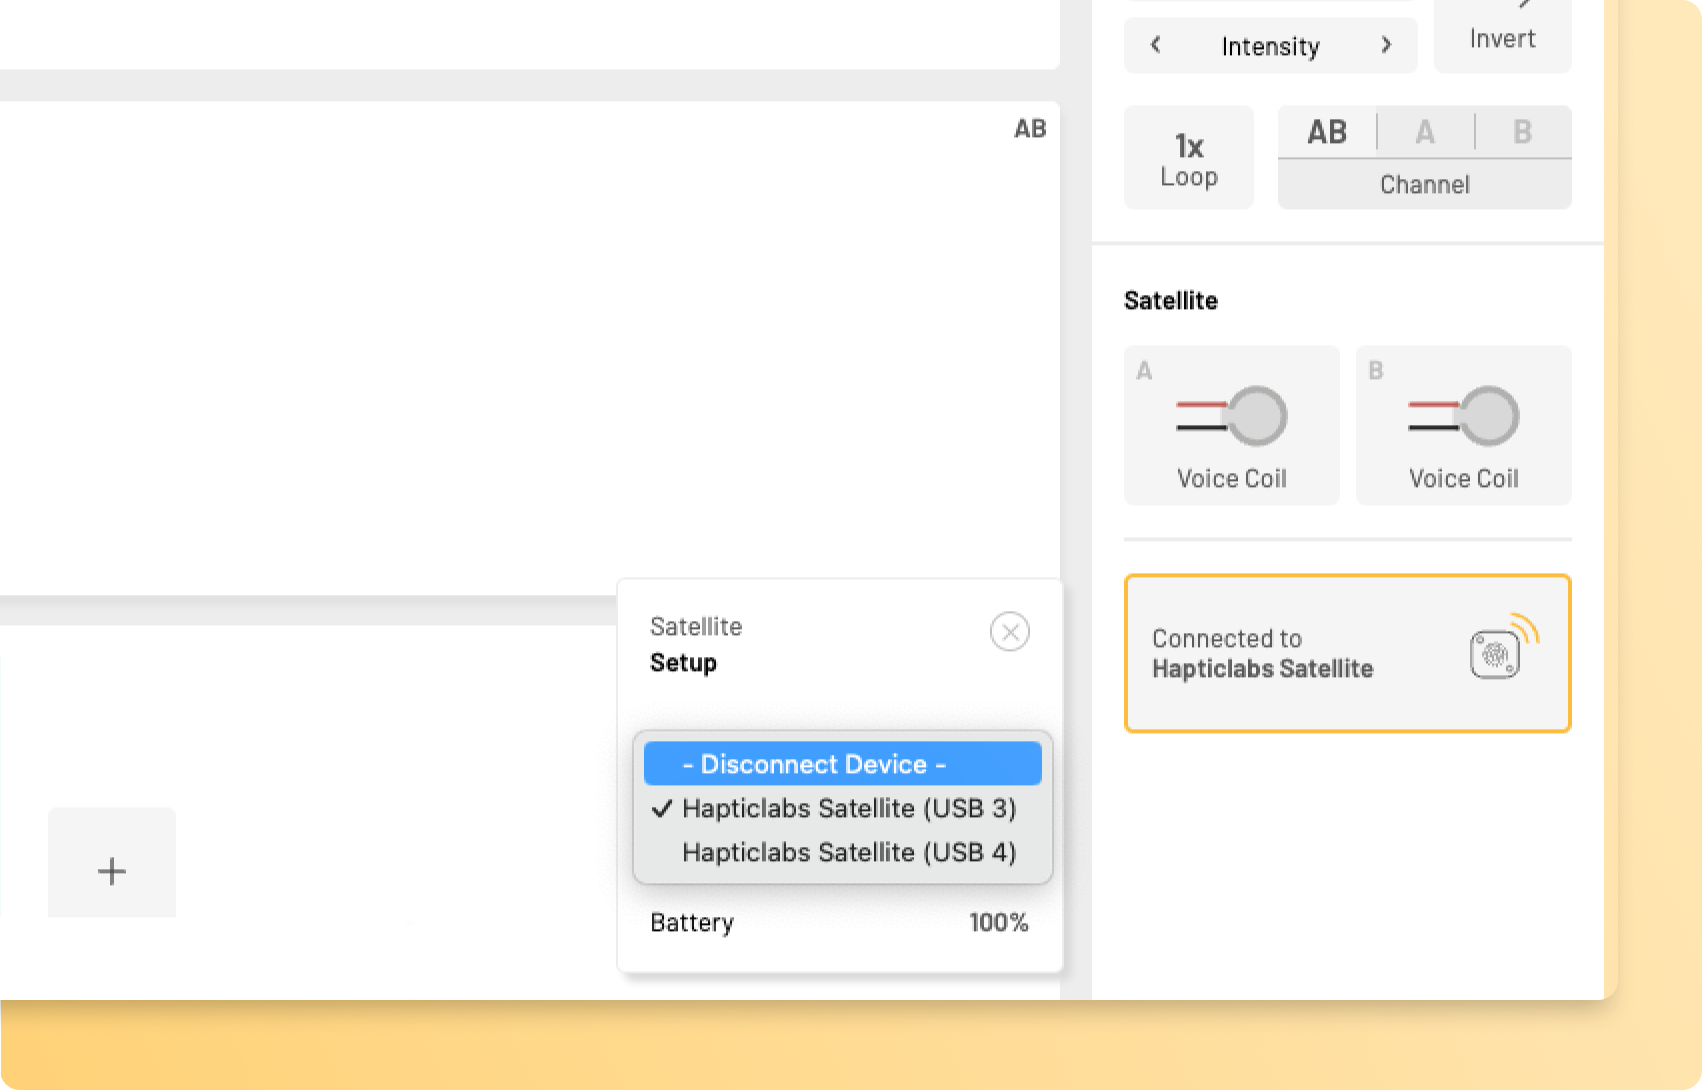
Only a single serial connection to the Hapticlabs Satellite is possible. After uploading the project, close the connection through the satellite menu by pressing "Disconnect Device" before establishing a connection from an external application.
Setup the trigger in Protopie
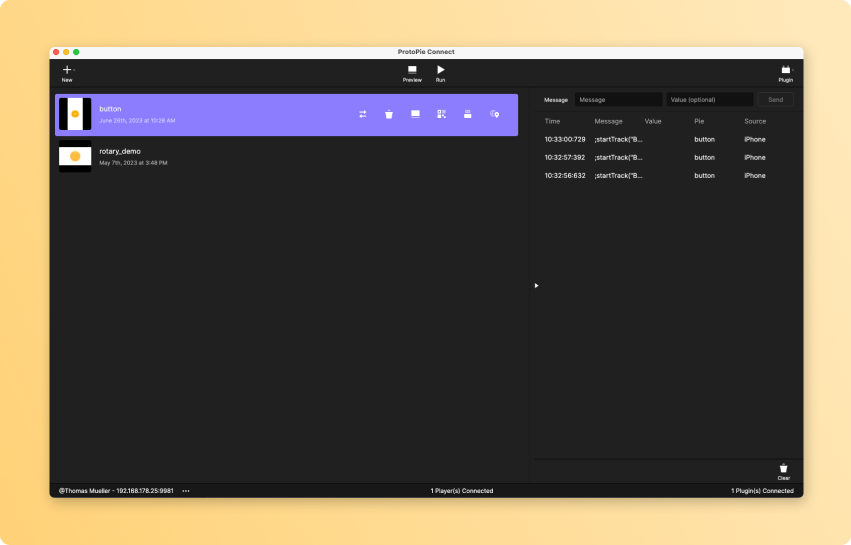
Download the rotary_demo.pie file and open it in Protopie Connect. To learn more about setting up a custom Protopie trigger, take a look at our Protopie documentation.
Arduino Setup
- Open a Serial monitor with Baud rate 115200 in Arduino with the Satellite (for example on macOS, it's typically called "SLAB_USBtoUART"). Send "startUART();" this should give you a confirmation message.
- Connect the rotary encoder and Satellite to an Arduino or similar micro controller according to the diagram. If you're using another board, change Software Serial pins to pins that support interrupt.
You probably need an external power supply for the Satellite!
- Upload the .ino file to the Arduino. If everything worked correctly you can see cw, ccw and click in the Serial Monitor when you interact with the rotary encoder. You can also now send Serial commands to the Arduino and it will forward it to the Satellite. For example send ;a(“v(1 120 200000)");
- Now close the Serial Monitor and open the .pie file in ProtoPie connect.
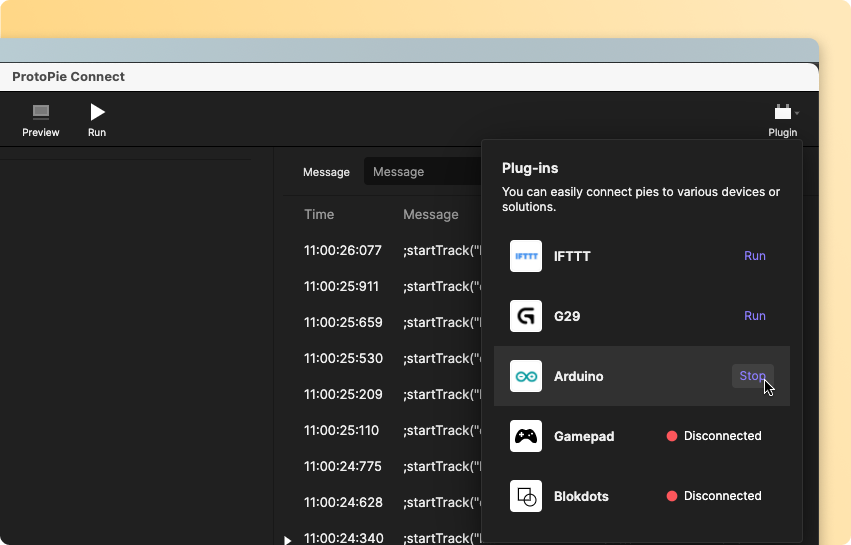
- Start the Serial connection in ProtoPie Connect with the Arduino in the top right menu called "Plugin", select Arduino, speed 9600 and the port of the Arduino. Make sure you don't select the port of the Satellite.
- If you rotate the rotary encoder, it should show the messages in ProtoPie Connect, vibrate the actuator and control the UI. In this example we are sending ;a("s()")b("s()");startTrack("pulseDial"); but you can send whatever you like. Make sure to call the ;a("s()")b("s()"); in adance to stop whatever is cureently playing.
- If you want to play the ProtoPie on a phone, click on the Connect button, select QR code and scan this with the ProtoPie app on your phone.
Connect to the Hapticlabs Satellite
Using ProtoPie Connect's "Connect to Arduino" functionality, you can interact with the Hapticlabs Satellite. Start the Serial connection in ProtoPie Connect in the top right menu called "Plugin", select Arduino, Baud rate 115200 and the port of the Hapticlabs Satellite (for example on macOS, it's typically called "SLAB_USBtoUART"). Hit Run

Manually trigger feedback
To test the connection you can manually send commands to the Hapticlabs Satellite from ProtoPie Connect using the "Message" field in the top right corner. The "Value" field can be left empty. Start by sending a simple vibration command: ;a("v()")b("v()"); . Both channels on the Satellite should respond with a short vibration and blinking of the LEDs. Send your custom track command eg. ;startTrack("Big bounce"); to test if the upload worked.
Start the prototype
Connect to your prototype device eg. your smartphone by scanning the QR code or connecting via USB and press "Run". Learn more in the Protopie Connect documentation.
Change the feedback
To alter the haptic output, make adjustments in Hapticlabs Studio and upload the tracks. Make sure to first disconnect in Protopie Connect and Connect in Hapticlabs Studio.
Example project
Check out our example project on GitHub, in which we used an Arduino microcontroller to read a rotary encoder and communicate to the Hapticlabs satellite via UART. ProtoPie is used to control the haptic signals as well as to visualise an interactive UI corresponding to the encoder turns.
We are currently actively developing more integrations and compatibility solutions. If you have any suggestions on what to tackle next, let us know!