Building interactive prototypes including UI triggers is very easy through the help of Protopie and Protopie Connect.
ProtoPie Connect direct interface <pro-label>★ pro<pro-label>
Hapticlabs Studio directly interfaces with ProtoPie Connect through a custom bridge (no plugin needed from your side). However, this requires an Enterprise subscription of ProtoPie Connect.
Within ProtoPie, you can use the following messages to trigger haptic signals:
Message: StartTrack, Value: "<trackName>"
With this command, you can play back a track that has been uploaded to the satellite. To this end, replace the <trackName> with the name of the track you want to play back, for example:
Message: StartTrack, Value: "Short Pulses"
Message: Stop
With this command, you can terminate any currently active playback.
Message: SetAmplitudeScale, Value: <amplitudeScale>
With this command, you can scale the intensity (amplitude) of the satellite output. This will be applied immediately and will also affect tracks played back in the future. The default value is 1.0, so you can reduce the intensity from its standard value by passing a scale value smaller than 1, e.g. Message: SetAmplitudeScale, Value: 0.7. By passing a scale value greater than 1, e.g. Message: SetAmplitudeScale, Value: 1.3, you will achieve amplified intensity. To reset the amplitude scaling, use Message: SetAmplitudeScale, Value: 1.0.
It should be noted that you can not increase the amplitude beyond 100%. If you e.g. selected 100% amplitude in a block within Hapticlabs studio and use Message: SetAmplitudeScale, Value: 2.0, the maximum amplitude will remain the same as with Message: SetAmplitudeScale, Value: 1.0.
Standalone hardware <pro-label>★ pro<pro-label>
It is also possible to connect to ProtoPie Connect without a ProtoPie Connect Enterprise subscription. For this, you can upload tracks to the satellite and then trigger them using the Arduino plugin:
Upload tracks from Hapticlabs Studio
Start by designing the tracks and giving them unique names to call from Protopie. Uploading project to the Satellite by hitting Satellite/ Upload Project to Satellite. Learn more about uploading your project to the satellite.

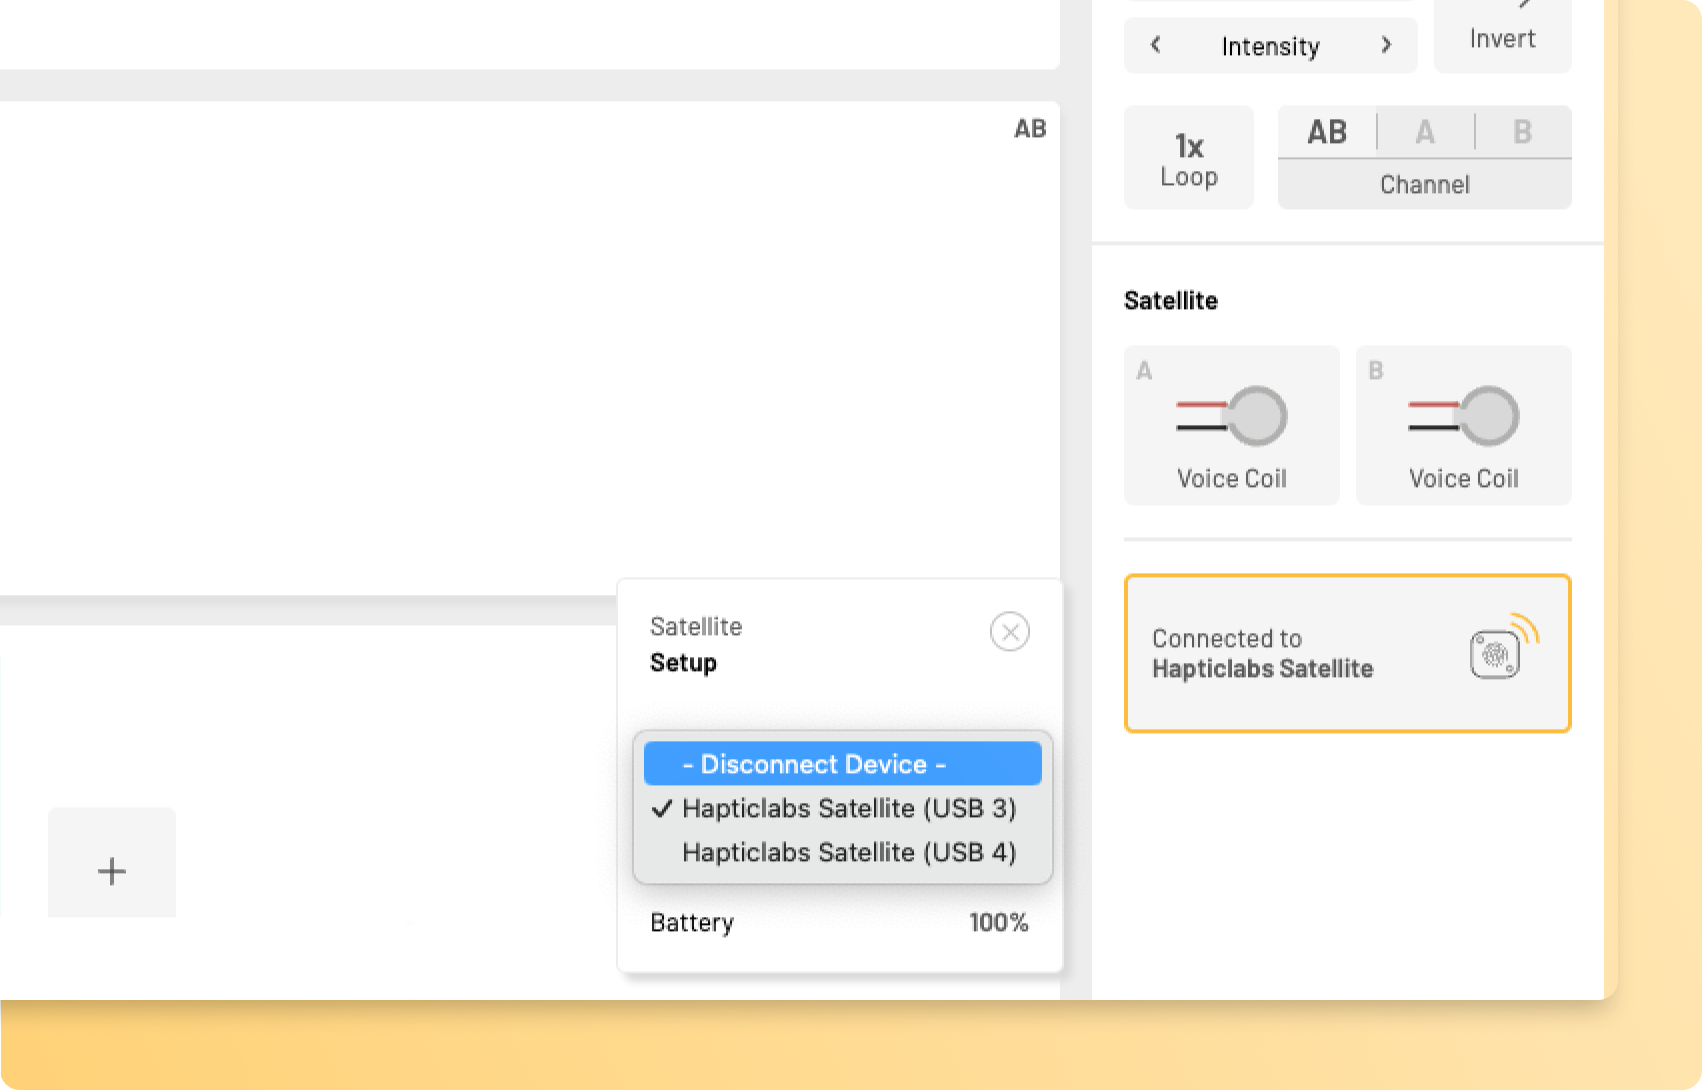
Close the serial communication
Only a single serial connection to the Hapticlabs Satellite is possible. After uploading the project, close the connection through the satellite menu by pressing "Disconnect Device" before establishing a connection from an external application.
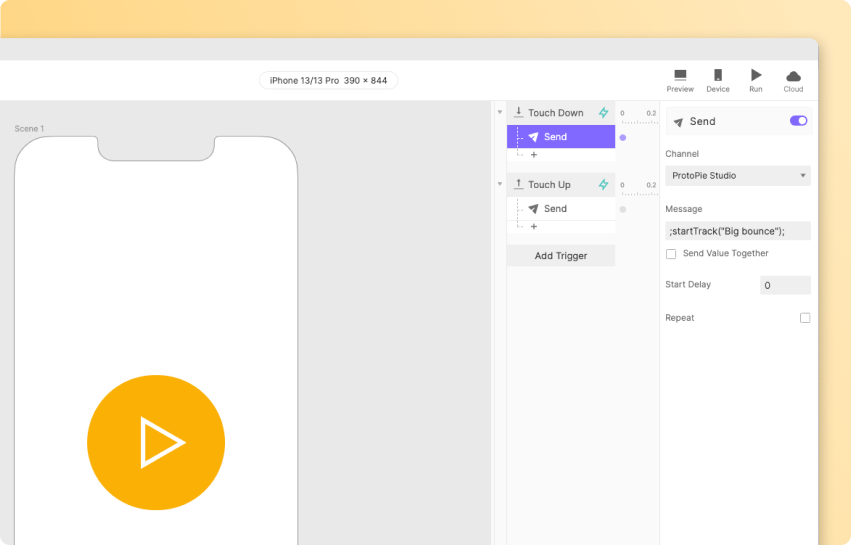
Setup the trigger in Protopie
Within Protopie add a "Send" event to any trigger with the following settings:
Channel: "Send to Protopie Studio"
Message: ";startTrack("trackName");" where you need to replace trackName with the name of the track you would like to trigger. For example, to play back a track called Big bounce, send ";startTrack("Big bounce");".
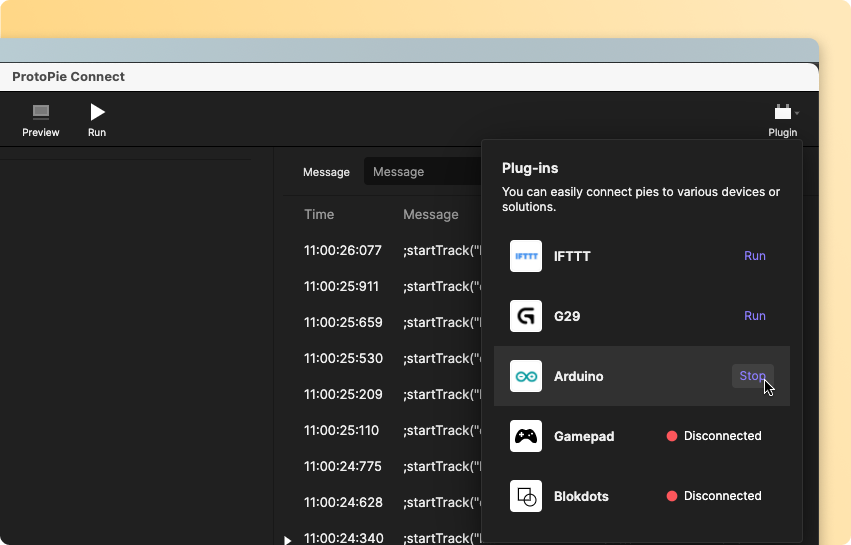
Connect to the Hapticlabs Satellite
Using ProtoPie Connect's "Connect to Arduino" functionality, you can interact with the Hapticlabs Satellite. Start the Serial connection in ProtoPie Connect in the top right menu called "Plugin", select Arduino, Baud rate 115200 and the port of the Hapticlabs Satellite (for example on macOS, it's typically called "SLAB_USBtoUART"). Hit Run

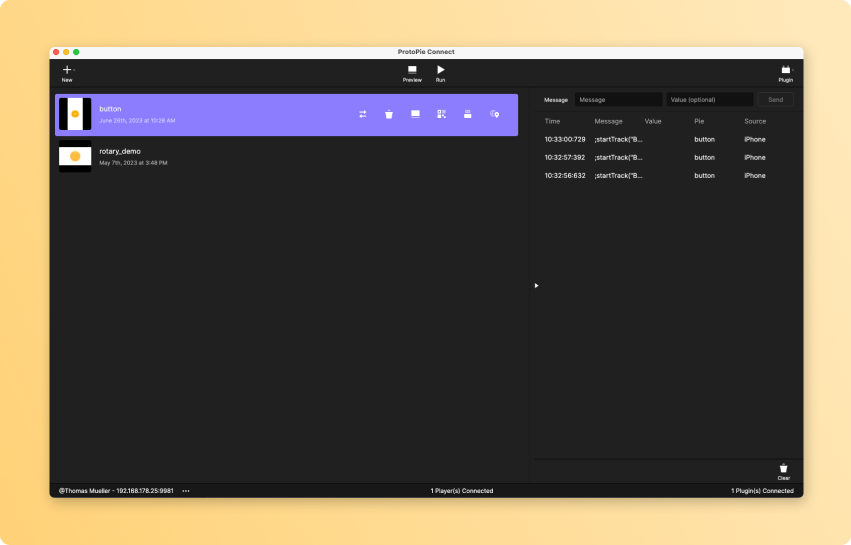
Manually trigger feedback
To test the connection you can manually send commands to the Hapticlabs Satellite from ProtoPie Connect using the "Message" field in the top right corner. The "Value" field can be left empty. Start by sending a simple vibration command: ;a("v()")b("v()"); . Both channels on the Satellite should respond with a short vibration and blinking of the LEDs. Send your custom track command eg. ;startTrack("Big bounce"); to test if the upload worked.
Start the prototype
Connect to your prototype device eg. your smartphone by scanning the QR code or connecting via USB and press "Run". Learn more in the Protopie Connect documentation.
Change the feedback
To alter the haptic output, make adjustments in Hapticlabs Studio and upload the tracks. Make sure to first disconnect in Protopie Connect and Connect in Hapticlabs Studio.
We are currently actively developing more integrations and compatibility solutions. If you have any suggestions on what to tackle next, let us know!