The Satellite menu
The Satellite menu is located at the bottom of the Settings panel. It consists of three important parts:
GPIOs and external triggers
Tracks can be played back without a connection to Hapticlabs Studio or a computer if they are saved on the satellite.
The direct save buttons
Two buttons, labelled “Pin 1”, and “Pin 2”, can be found. These serve to upload a track onto the Satellite, so it can be played back later. If the satellite is in Trigger mode, the track will be saved to the Rising event (see The external trigger menu). If the satellite is in Loop mode, it will be saved to the loop slot.
The external trigger menu
You can select from Off, Loop, Trigger, and UART mode.
Off mode
In off mode, the GPIOs are completely disabled and serve no function.
Loop mode
In loop mode, the track saved to “Pin 1” will be played back repeatedly as long as the physical input switch “S1” is pulled to a logical HIGH value (3.3V) or the touch sensor on top of the Satellite is touched.
<pro-label>★ starter<pro-label>
The track saved to “Pin 2” will be played back repeatedly as long as the physical input switch “S2” is pulled to a logical HIGH value (3.3V).
Only one track can be saved on each slot for each channel. Saving a track to a slot will overwrite what was previously saved on that slot for the selected channel(s). By pressing the 'x' symbol, you can remove saved tracks.
See also Triggering Saved Tracks.
Trigger mode <pro-label>★ starter<pro-label>
In trigger mode, you can define tracks to be triggered whenever the GPIO's input value changes. When the value changes from off to on, the track saved in the Rising-Edge (Touch) slot will be started. When the value changes from on to off, the track saved in the Falling-Edge (Release) slot will be started. As opposed to the Loop mode, tracks will only play once per Rising or Falling event.
See also Triggering Saved Tracks.
UART mode <pro-label>★ pro<pro-label>
In UART mode, you can attach another microcontroller to the GPIOs to communicate through UART to trigger saved tracks. See UART interface.
The upload tracks button <pro-label>★ pro<pro-label>
By pressing the button labeled "Upload tracks", you can upload all tracks of the current project to the satellite to later trigger it through the -> Serial interface or the -> UART interface.
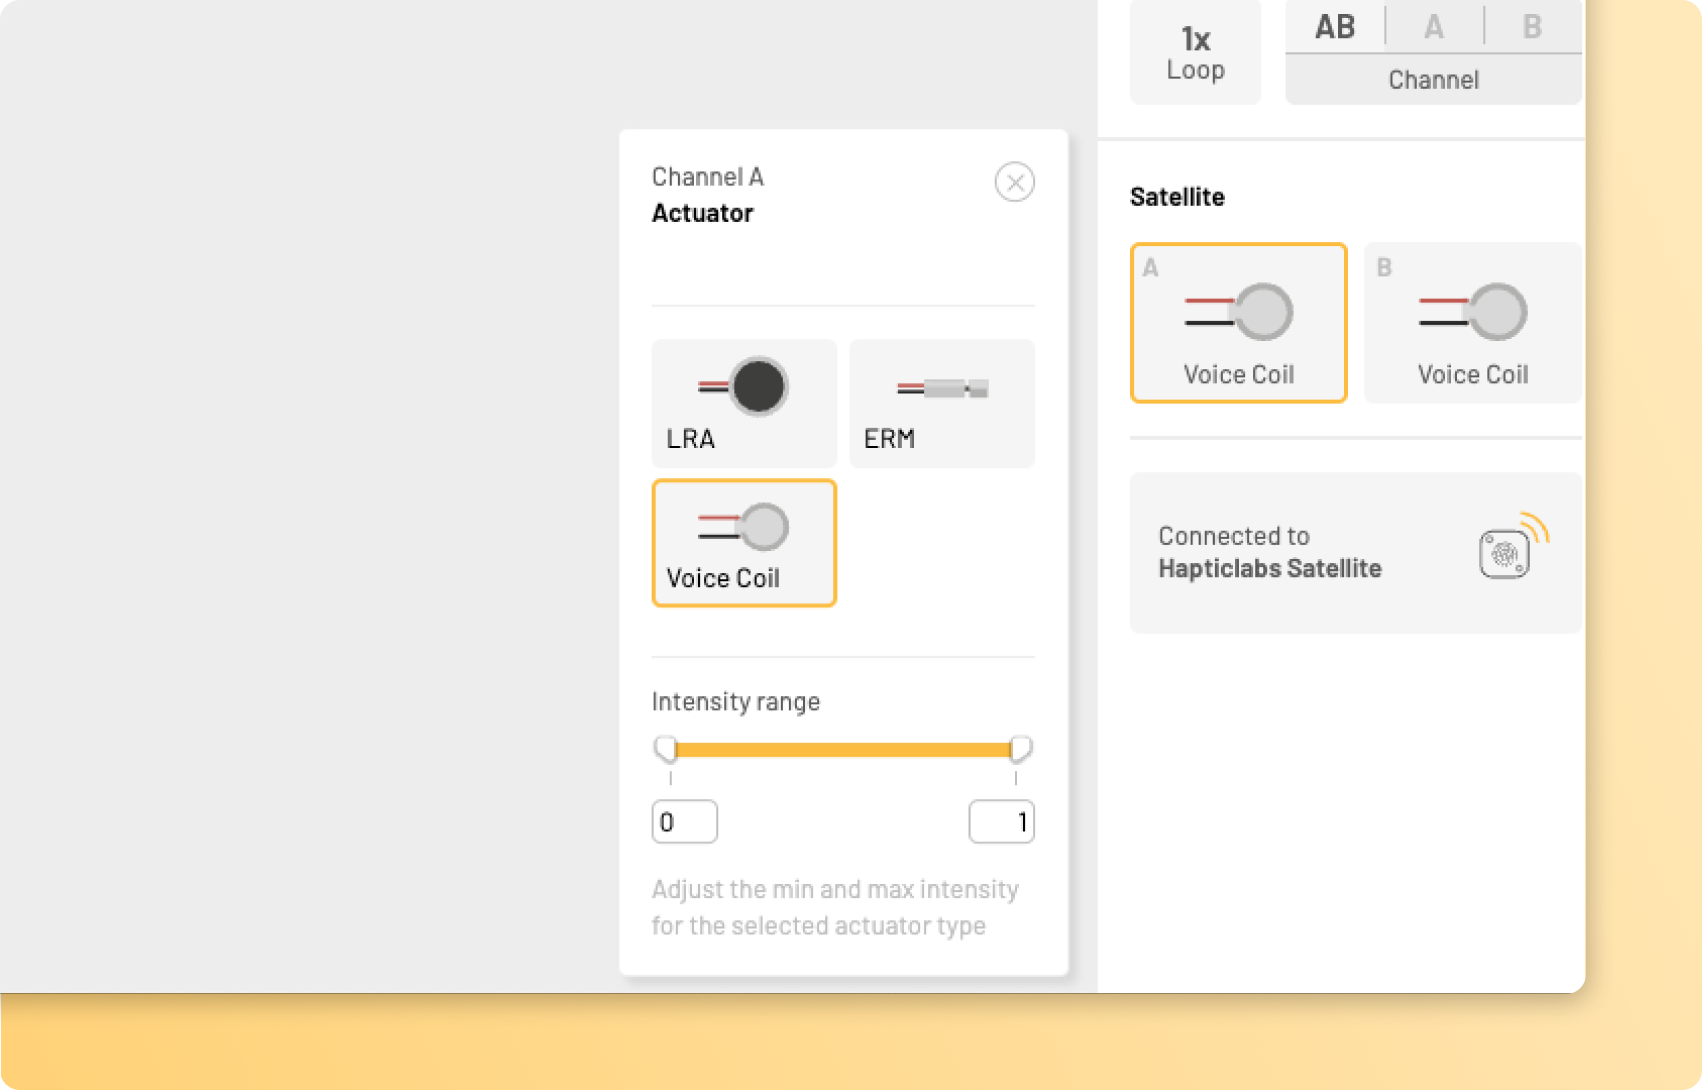
The actuator selector
Hapticlabs Satellites are capable of driving any electromagnetic actuator. Typically, those actuators are classified as either LRA (Linear resonant actuator), ERM (Eccentric rotating mass) or Voice Coil. After clicking on the respective panel, you can select the correct actuator type for each channel. It is important to select the correct actuator type, as the different actuator types require inherently different signals to correctly drive them. Since selecting an incorrect type does not result in damage to the actuator, it is a safe strategy to try out the different options if you are unsure about the type of your actuator.

The intensity range slider
Some actuators, especially large ERMs, require a higher starting voltage. In that case a very low intensity level eg. 1% can result in no actuation at all.
To adjust the intensity range of your actuator, click the corresponding panel, and pull the limits with your mouse or edit the numerical values for the intensity range slider on the bottom of the actuator selection menu.
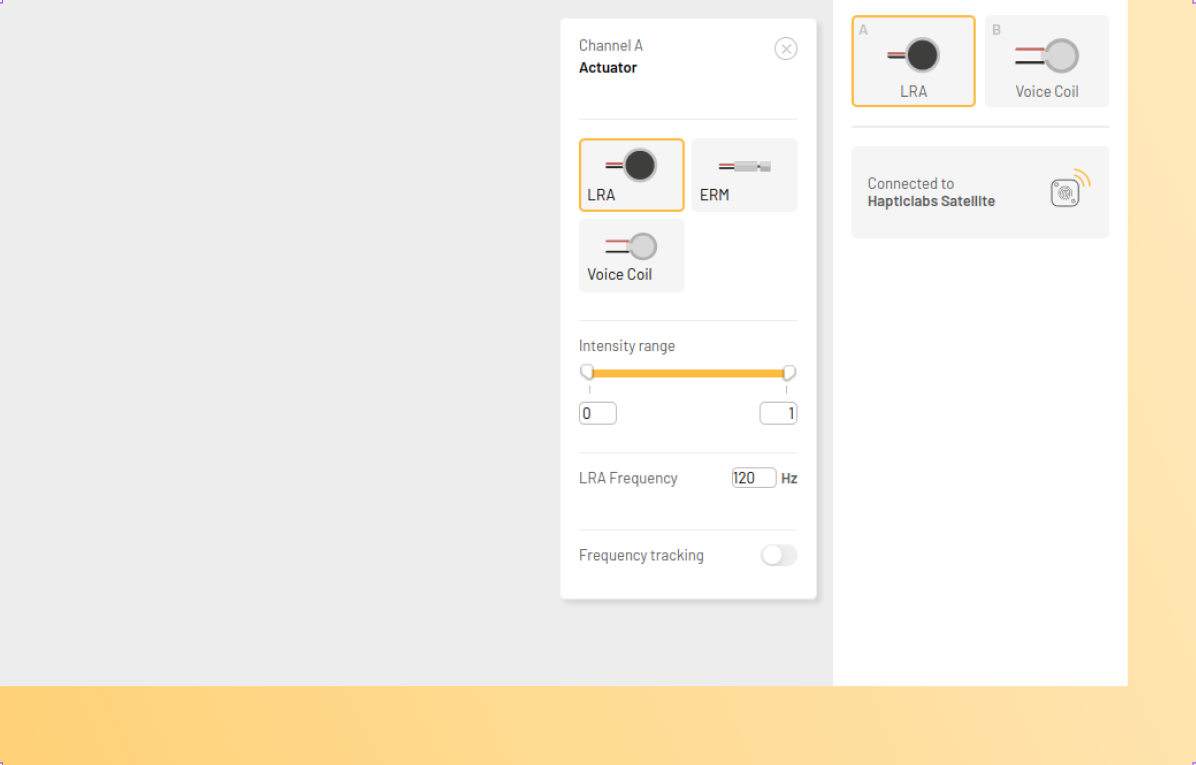
The frequency field [LRA only]
LRAs achieve maximum intensity if they are driven at their natural frequency. This natural (or resonance) frequency depends on the specific actuator hardware and can be found in the datasheet. If you use an LRA, enter its natural frequency in this field.
Frequency tracking [LRA only]
Depending on the application, your LRA might be in direct contact or mechanically coupled with different objects and materials. This can affect the resonance frequency of the resulting system. By activating the frequency tracking functionality, the Satellite will automatically determine the natural frequency of your device. It will use this frequency to drive the LRA. Throughout time, the natural frequency is regularly reevaluated and will be updated live. This can be helpful if you want to try what your LRA behaves like in contact with different materials. However, due to the frequent frequency updates, results in this mode might be difficult to reproduce.
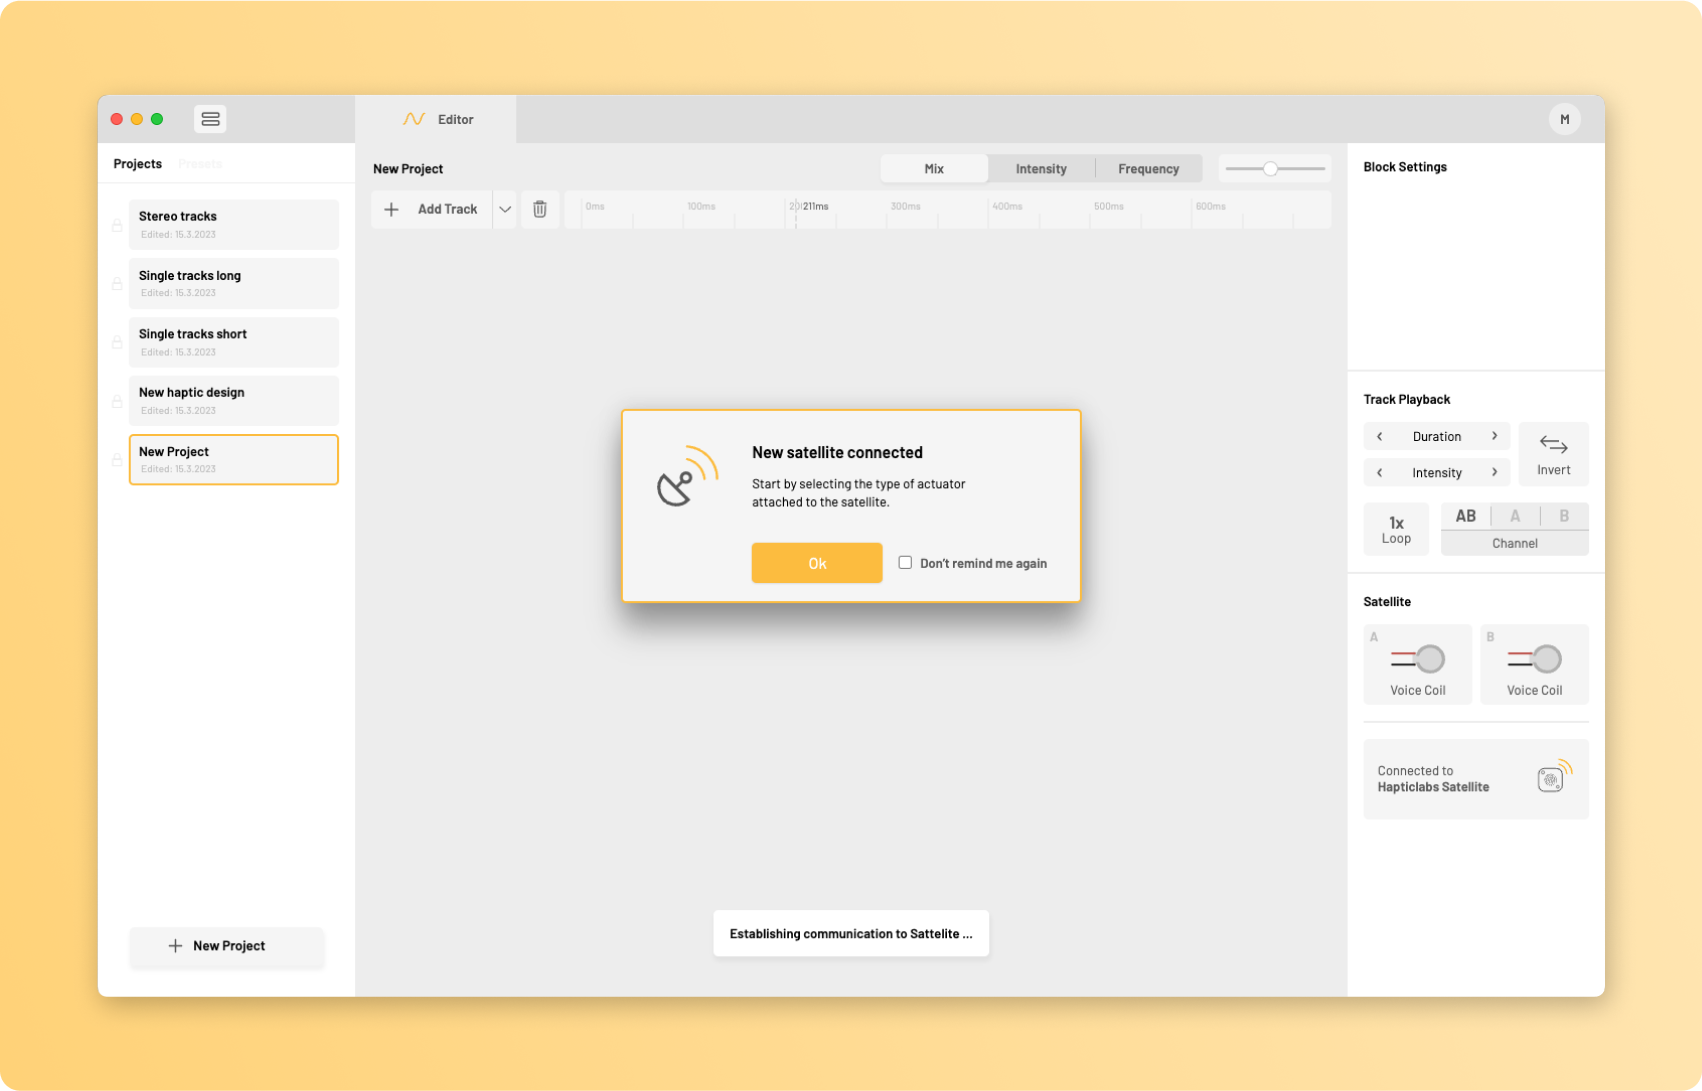
The satellite selector
Hapticlabs Studio will typically connect automatically to the Satellite. In this case, this panel will inform you that you are connected to the Hapticlabs Satellite.

Selecting between multiple satellites
If you have multiple satellites connected to your computer, you can click on the panel and select the device you would like to work with from the drop-down menu that will appear.
Manual satellite selection
In rare cases, the automatic connection fails. Then, you can click the panel and select your device from the drop-down menu that will appear.
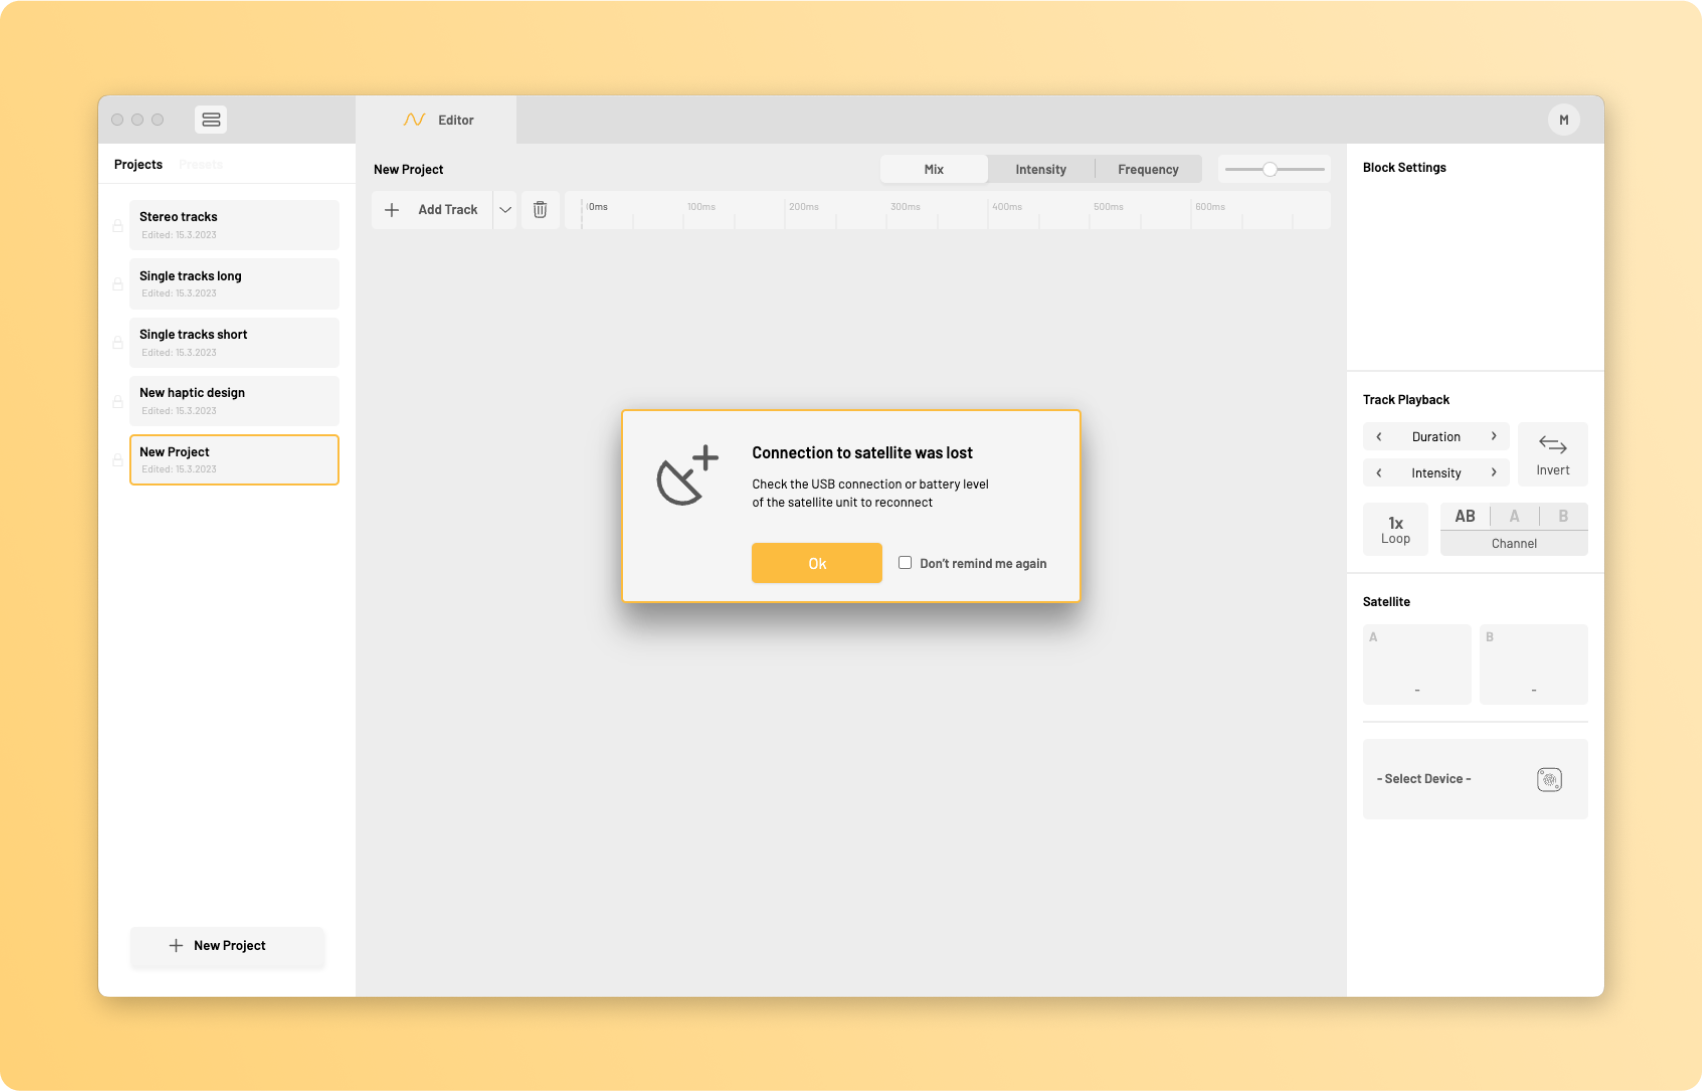
Disconnecting a satellite
If you want to disconnect a satellite, you can click the panel and select “-” from the drop-down menu that will appear.
Connection problems
If your satellite is connected to your computer, but does not automatically connect nor show up in the drop-down menu after clicking the panel, please visit the Troubleshooting page.